How to Reduce Image Size for Government Forms: Complete Guide to Compressing Photos and Signatures
P
Pushpam AbhishekFounder & Lead Developer
📅 Published: Sep 19, 2026
⏱️ 18 min read
👁️ 32 views
reduce size in kb
Applying for government jobs, entrance examinations, scholarships, passports, licenses, certificates, or other online government services often requires applicants to upload a photograph and signature within strict file-size and dimension.
A photo that looks perfectly fine on your phone may still be rejected because the file is too large, the dimensions are incorrect, or the image format is unsupported. how to reduce image size for government forms can help you prepare compliant files without unnecessarily reducing image quality.
This guide explains practical methods to reduce JPG, PNG, and other image files to required KB limits, resize dimensions, choose the right format, avoid common upload errors, and prepare images efficiently for online government applications.
Why Do Government Forms Have Image Size Requirements?
Government application portals commonly place restrictions on uploaded photographs, signatures, certificates, and other documents because millions of files may need to be stored, transferred, processed, and reviewed.
Smaller files require less storage space and can upload more quickly, especially for applicants using mobile networks or slower internet connections.
Standardized image dimensions and file sizes also make it easier for government systems to process applications consistently.
For example, an application may specify that a photograph must be in JPG format and within a particular file-size range, while a signature may have separate width, height, and KB requirements. These requirements are not universal, so applicants should always check the instructions published for the specific application.
Another reason these restrictions matter is automated document processing. Many online portals use validation systems that check the uploaded file before allowing an application to proceed.
The system may verify the extension, MIME type, file size, image dimensions, and sometimes the visual characteristics of the uploaded image. A file can therefore be perfectly readable but still fail validation if it exceeds the maximum allowed size. For this reason, knowing how to reduce image size for government forms involves more than simply making a picture smaller
How to Reduce Image Size in KB for Government Forms
The simplest way to reduce image size is to use an image compression or resizing tool that allows you to control the output file size. Start by checking the official application instructions and identify the exact requirement.
If the portal says the photograph must be between 20 KB and 50 KB, for example, your objective is not necessarily to make the file as small as possible. Instead, you should create a file that remains within the permitted range while maintaining sufficient visual clarity. Similarly, if a signature must be below a particular limit, reducing excessive resolution and adjusting JPEG quality can often produce a much smaller file without making the signature difficult to read.
Image dimensions have a major effect on file size. A modern smartphone photograph can contain thousands of pixels in width and height, even though a government portal may require a relatively small image. If the original photograph is 4000 × 3000 pixels, reducing it to the dimensions specified by the application can dramatically reduce the amount of image data. After resizing, compression can be applied to reduce the file further.
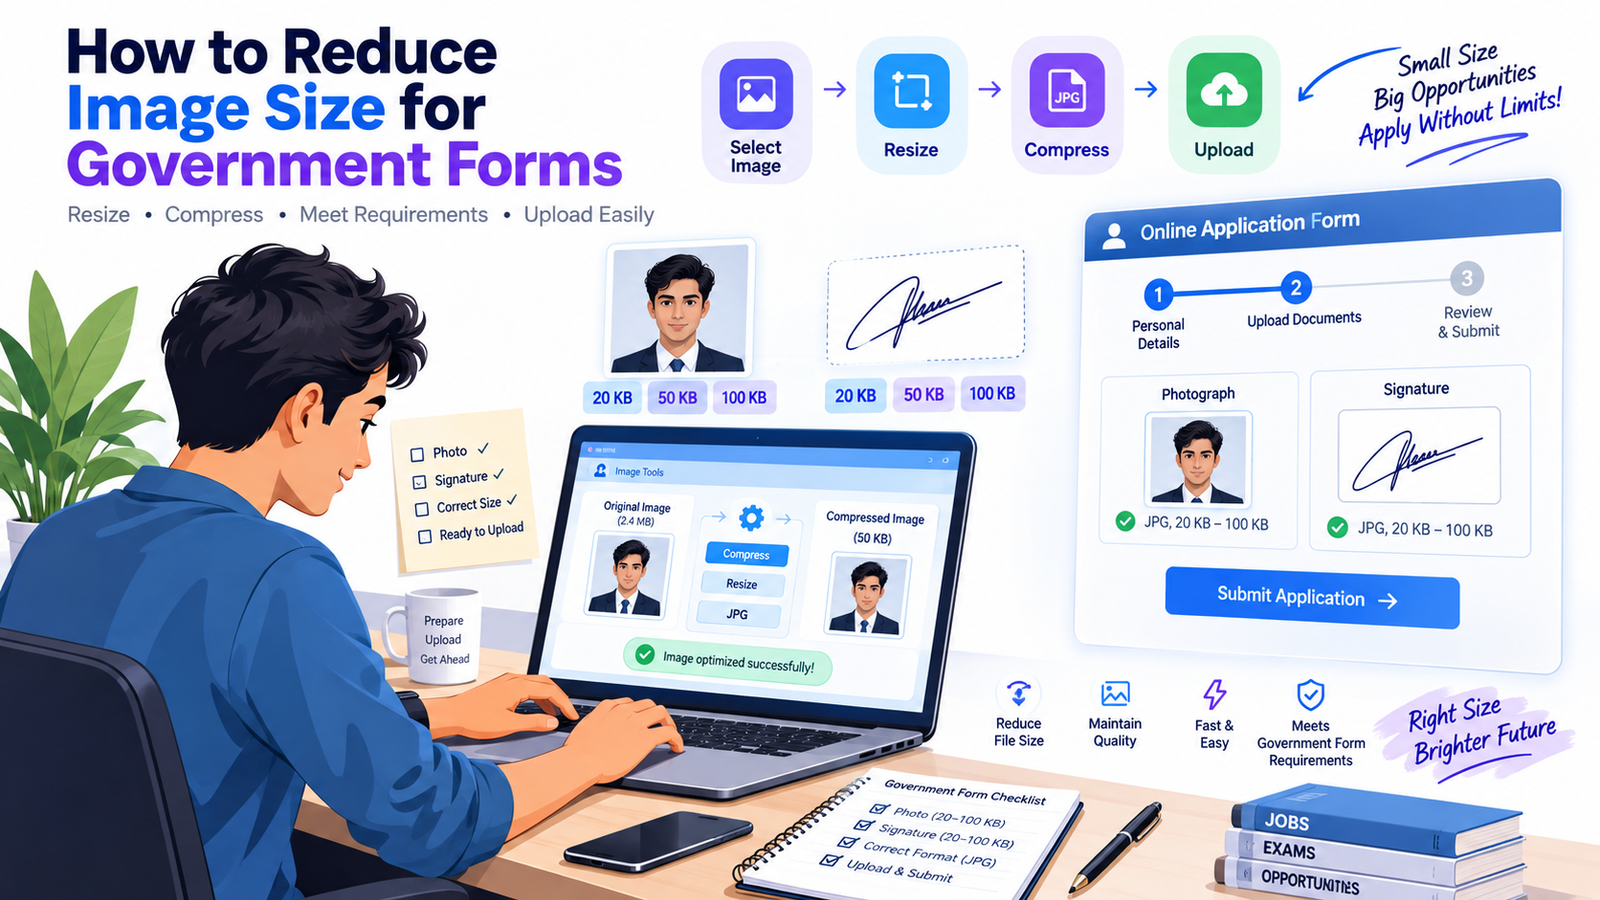
A useful workflow is therefore crop → resize → compress → check file size → verify quality.
Best Image Formats for Government Application Uploads
Choosing the correct image format is another important part of preparing files for government forms. JPEG or JPG is frequently used for photographs because it provides good visual quality at relatively small file sizes. JPEG compression is particularly effective for photographic images containing many colors and gradients. If the application instructions specifically request JPG or JPEG, save the final file in that format rather than simply renaming a PNG extension to JPG. Changing the filename extension does not convert the underlying image format and can result in validation errors.
PNG can be useful for images containing sharp graphics, transparency, or limited colors, but it can sometimes produce larger files than JPEG when used for photographs. A signature with a plain background may sometimes compress efficiently as JPEG, depending on the portal's requirements. However, you should follow the application's instructions rather than choosing a format solely because it produces a smaller file. Newer formats such as WebP and AVIF can provide excellent compression, but many older government portals may not accept them. If the official instructions specify JPG/JPEG, use JPG/JPEG.
Before uploading an image, inspect its actual file properties. Check the extension, file size, width, height, and visual quality. Windows users can usually right-click an image and open its properties to see basic file information, while many image-editing and compression tools display the dimensions and output size directly. Do not assume that an image named photo.jpg automatically satisfies the portal requirements. A 3 MB JPG is still a 3 MB file, even though JPG is generally considered a compressed format. Similarly, a tiny file may be below the minimum permitted size and therefore be rejected. The objective is to meet the application's stated requirements, not simply to minimize the number of KB.
How to Resize Photo and Signature for Government Exams
Government examination forms frequently provide separate requirements for photographs and signatures. A photograph may need a particular aspect ratio, while a signature may need a different width-to-height relationship. The first step is to crop the original image appropriately. Cropping removes unnecessary areas around the subject and allows the final image to use its available pixels more efficiently. For a photograph, make sure the face and required portions of the upper body remain visible according to the examination instructions. For a signature, ensure that the complete signature remains inside the image and is not cut off at the edges.
After cropping, resize the image according to the exact dimensions specified by the relevant examination or application. Dimensions may be provided in pixels, such as 200 × 230 pixels, or sometimes through physical measurements such as centimeters or millimeters. If pixels are specified, enter those pixel dimensions directly into the resizing tool. If only physical dimensions and DPI are provided, the relationship between physical size, resolution, and pixel dimensions must be considered. Avoid stretching the image disproportionately because this can distort a face or signature. Maintain the correct aspect ratio unless the official instructions explicitly require different dimensions.
Once the dimensions are correct, compress the image until its file size falls within the permitted range. For example, if an application requires a photograph between 20 KB and 50 KB, begin with a properly cropped and resized photograph and gradually adjust JPEG quality until the resulting file falls inside that range. Do not keep reducing quality after the file already meets the requirement.
Step-by-Step Method to Reduce JPG Image Size for Online Forms
Step 1: Read the official instructions. Before editing anything, identify the required file format, minimum and maximum file size, image dimensions, background requirements, and any other conditions. Requirements can vary between examinations, recruitment portals, scholarship applications, government services, and different application cycles. Do not rely on a requirement from an older application simply because the organization is the same. Always use the instructions associated with the application you are currently completing.
Step 2: Start with the original image. Whenever possible, keep an unedited copy of your original photograph or signature. Create a working copy for resizing and compression. This gives you the flexibility to return to the original if the first attempt becomes too blurry or if you need a different output size. Avoid repeatedly editing and saving the same compressed file because multiple generations of lossy JPEG compression can gradually reduce image quality.
Step 3: Crop unnecessary areas. Cropping is one of the easiest ways to reduce the amount of image data. Remove empty borders and unnecessary background while following the application's instructions. For signatures, make sure the entire signature is visible. For photographs, maintain the required framing and head position. Do not crop so aggressively that required parts of the image disappear.
Step 4: Resize the image. Reduce the pixel dimensions to the required size. If the portal specifies exact dimensions, use those values. If it provides only a maximum dimension, keep the aspect ratio and resize proportionally. Large smartphone photographs are often much bigger than necessary for web-based application forms, so reducing their dimensions can provide a substantial reduction in file size before compression is even applied.
Step 5: Compress the image. Save the resized image as JPG/JPEG when the application requires that format. Adjust the compression or quality setting until the file reaches the permitted KB range. A quality setting around 70–85% can sometimes provide a useful starting point, but there is no universal percentage because the final file size depends on the image's dimensions, colors, details, and compression algorithm.
Step 6: Check the final file. Confirm that the file extension and actual format are correct, the file size is inside the permitted range, the dimensions match the instructions, and the image remains readable. Open the final file separately before uploading it. This simple check can catch accidental corruption, wrong orientation, unexpected cropping, or an incorrectly exported file.
Step 7: Upload and verify. Select the final file from your device and upload it to the official application portal. If the portal reports an error, carefully read the message rather than repeatedly uploading the same file. Errors may indicate excessive file size, unsupported format, incorrect dimensions, or another validation problem. Correct the specific issue and generate a new output file.
Common Problems When Uploading Photos to Government Forms
One of the most common problems is confusing image dimensions with file size. Dimensions refer to the number of pixels, such as 300 × 400 pixels, while file size refers to storage space, such as 45 KB. Reducing dimensions can often reduce file size, but the two measurements are not identical. An image with relatively small dimensions can still have a larger file size depending on its format and compression settings. Conversely, a high-resolution image with strong compression can sometimes be smaller than expected. Successful preparation requires checking both values.
Another common mistake is using the wrong file type. A user may rename a file from photo.png to photo.jpg and assume that it has been converted. It has not. The underlying image data remains PNG unless an actual conversion process has taken place. Government portals that validate file signatures or MIME types can detect this mismatch. Always use an image editor or converter to create the required format.
How to Reduce Image Size Online Without Losing Too Much Quality
Online image compression tools can make the process faster because they combine resizing, format conversion, and compression in a browser-based workflow. A useful tool should clearly display the original file information and the resulting file information so that users can confirm whether the output meets their target. For government forms, a tool that supports specific KB targets can be particularly convenient because applicants can work toward a required size rather than repeatedly guessing compression settings.
When using an online tool for an important application, pay attention to privacy and file-handling practices. Government application photographs and signatures are personal documents, so users should understand whether an online service uploads files to a server or processes them locally in the browser. Browser-based processing can be useful when available because the image can be processed on the user's device instead of being transferred to a remote server. Regardless of the tool used, users should review its privacy policy and avoid uploading sensitive documents to unfamiliar websites.
For applicants who regularly complete online forms, keeping a small collection of correctly prepared source files can save time. You might maintain an original high-quality photograph, a standard application photograph, and versions prepared for different documented requirements. However, do not assume that one prepared image will work for every examination or government service. Requirements can change, and different portals can request different dimensions and file-size ranges. Treat the official instructions for the current application as the final authority.
How to Reduce Image Size to 20KB, 50KB, 100KB or Other Limits
Reducing an image to an exact or narrow KB target requires balancing dimensions, compression quality, and image complexity. Suppose a government application requires a photograph below 100 KB. If your original image is several megabytes, first resize it to a sensible dimension rather than immediately applying extremely aggressive compression. Once the dimensions are appropriate, save it as JPEG and adjust quality until the file is below 100 KB. If the application requires 20–50 KB, continue adjusting until the output falls between those limits.
If an image is still too large after reasonable JPEG compression, examine its dimensions. Excessive pixel dimensions may be the main reason the file remains large. Reducing the width and height can often produce a larger improvement than repeatedly lowering JPEG quality. If the image becomes blurry before reaching the required size, the dimensions may need to be reduced more intelligently while maintaining enough resolution for the intended use. For signatures, removing unnecessary blank space around the signature can also make a meaningful difference.
Exact-size compression is not always mathematically predictable because different photographs contain different amounts of visual information. A detailed outdoor photograph may require more data than a simple portrait with a plain background. Therefore, an exact 50 KB target may require several encoding attempts. A well-designed compression tool can automate this process by testing different quality levels and selecting an output that satisfies the requested size while preserving as much quality as practical. Afterward, always inspect the final image instead of relying exclusively on its numerical file size.
Tips for Preparing Government Application Photos Correctly
Always use a clear, recent photograph when the application requires one. Follow the instructions for background color, lighting, facial visibility, head position, and other photographic requirements. Compression cannot correct a photograph that violates the application's visual rules. If the instructions require a plain background, changing the file size will not make a cluttered background acceptable. Similarly, if a specific photograph period or appearance is required, applicants should follow the official instructions rather than relying on generic photo-resizing advice.
Keep the face sharp enough to remain recognizable after compression. JPEG artifacts become particularly noticeable around high-contrast edges, so aggressive compression can affect facial details, hair edges, glasses, and other features. A photograph that looks acceptable at full resolution may appear significantly worse after being reduced to a very small file. Check the final compressed version at normal viewing size before uploading it.
For signatures, use a clean signature on the type of background requested by the application. Avoid unnecessary shadows, dark borders, stains, or excessive blank space. Crop closely while keeping the complete signature visible. If the portal specifies exact dimensions or a particular KB range, follow those values precisely. Since signatures can contain thin strokes, excessive compression can make them fuzzy or cause parts of the signature to disappear, so visual inspection is especially important.
Can You Reduce Image Size Without Losing Quality?
It is more accurate to say that you can reduce image size while minimizing noticeable quality loss rather than guaranteeing zero quality loss. Lossless compression can reduce file size without changing image information, but the reduction may not be enough when a government portal imposes a very small KB limit. Lossy JPEG compression can achieve much greater reductions, but it discards some image information. The practical objective is to find a balance where the image meets the upload requirement while remaining visually acceptable.
Resizing can also reduce file size without necessarily producing an obvious quality problem when the original image contains far more pixels than the application needs. For example, a multi-megapixel smartphone photograph may contain substantially more resolution than required for a small online application preview. Reducing its dimensions can remove unnecessary data while maintaining sufficient detail for the intended purpose. This is why resizing before aggressive compression is often a useful strategy.
The best result usually comes from combining several moderate changes rather than relying on one extreme adjustment. Crop unnecessary areas, resize to an appropriate dimension, select the required format, and then compress to the target KB range. This workflow can produce a smaller image while preserving significantly more visual quality than simply pushing JPEG quality to its lowest setting.
Conclusion: How to Reduce Image Size for Government Forms
Learning how to reduce image size for government forms is an important practical skill for anyone completing online applications. The key is to treat file size, image dimensions, format, and visual quality as separate but connected requirements. Start by reading the official instructions, then crop the image appropriately, resize it to the required dimensions, convert it to the specified format, and compress it until the file falls within the permitted KB range.
For photographs and signatures, avoid excessive compression because an extremely small file may become blurry or difficult to recognize. Check the final file before uploading and confirm its actual extension, dimensions, file size, and appearance. When an exact target such as 20 KB, 50 KB, or 100 KB is required, use a tool capable of targeted compression rather than repeatedly guessing quality settings. Most importantly, remember that the official application instructions always take priority because requirements vary between government portals, examinations, recruitment processes, scholarships, and other online services.
FAQs: Reducing Image Size for Government Forms
How do I reduce image size for government forms?
First check the official file-size and dimension requirements. Then crop unnecessary areas, resize the image, save it in the required format such as JPG, and compress it until the final file falls within the permitted KB range.
How can I reduce a JPG to 50KB?
Resize the image to an appropriate dimension and use JPEG compression. Gradually reduce the quality setting or use a targeted compression tool until the resulting file is between the required limits. Always check the final image for clarity.
How do I reduce a photo to 20KB for an online application?
Start with the original photograph, crop it according to the application's instructions, reduce its dimensions if appropriate, and save it as JPEG. Then adjust compression until the file reaches approximately 20 KB or the specific range required by the portal.
How do I reduce an image to 100KB without making it blurry?
Resize the image before applying heavy compression. A correctly sized image often requires less compression to reach 100 KB. Use moderate JPEG quality and inspect the final output before uploading it.
Is JPG or PNG better for government forms?
Use whichever format the official application specifies. JPG/JPEG is commonly used for photographs because it can provide relatively small files, while PNG may be appropriate for certain graphics. Do not choose a format solely based on file size when the portal specifies a particular format.
Why is my JPG still too large?
A JPG can still be large if its pixel dimensions are very high, even when JPEG compression is being used. Reduce unnecessary dimensions and then compress the image further while maintaining acceptable visual quality.
Can I change a PNG file extension to JPG?
No. Renaming the extension does not convert the image. You need to actually export or convert the PNG into JPEG format using an image editor or image-conversion tool.
What is the difference between image size and file size?
Image dimensions describe the number of pixels, such as 300 × 400 pixels. File size describes how much storage the file occupies, such as 45 KB or 2 MB. Both may be relevant to government application requirements.
How do I resize a signature for a government application?
Scan or photograph the signature clearly, crop unnecessary blank space, resize it to the dimensions specified by the application, save it in the required format, and compress it to the required KB range without making the signature unreadable.
Can I use an online image compressor for government applications?
Yes, provided the tool produces the required format, dimensions, and file size. Because photographs and signatures can contain personal information, check the service's privacy and file-processing practices before uploading sensitive files.
Why does the government portal reject my image even though the file size is correct?
The portal may also check the file format, image dimensions, filename, MIME type, or other requirements. Review the application's complete image instructions rather than checking only the KB value.
Should I compress the original photograph repeatedly?
It is better to keep the original photograph untouched and create a separate working copy. Repeatedly saving a JPEG can cause cumulative quality loss. Generate the final application version from the best available original whenever possible.
What should I do if my image becomes blurry after compression?
Try reducing the dimensions appropriately before lowering JPEG quality further. You can also start again from the original image and use a different compression level. The goal is to meet the required file size while retaining sufficient clarity.
Share this guide
P
Pushpam Abhishek
Founder & Lead Developer · ReducerImage
Founder of ReducerImage based in Muzaffarpur, Bihar. Architect of the 100% client-side privacy-first image compression and format optimization engine with zero cloud uploads.

Reader Comments (0)